

This is what I make. I have spent all my life learning to do it. It is art for art's sake and do not forget that. I do not belong in this world. Hence, considered strange. Let's document that too. Right here.
Showing posts with label paper mache. Show all posts
Showing posts with label paper mache. Show all posts
Thursday, October 31, 2019
Marionette

Wednesday, October 23, 2019
Elemental Boxes #1&2


Boxes with color wheel rock borders


Wednesday, February 20, 2019
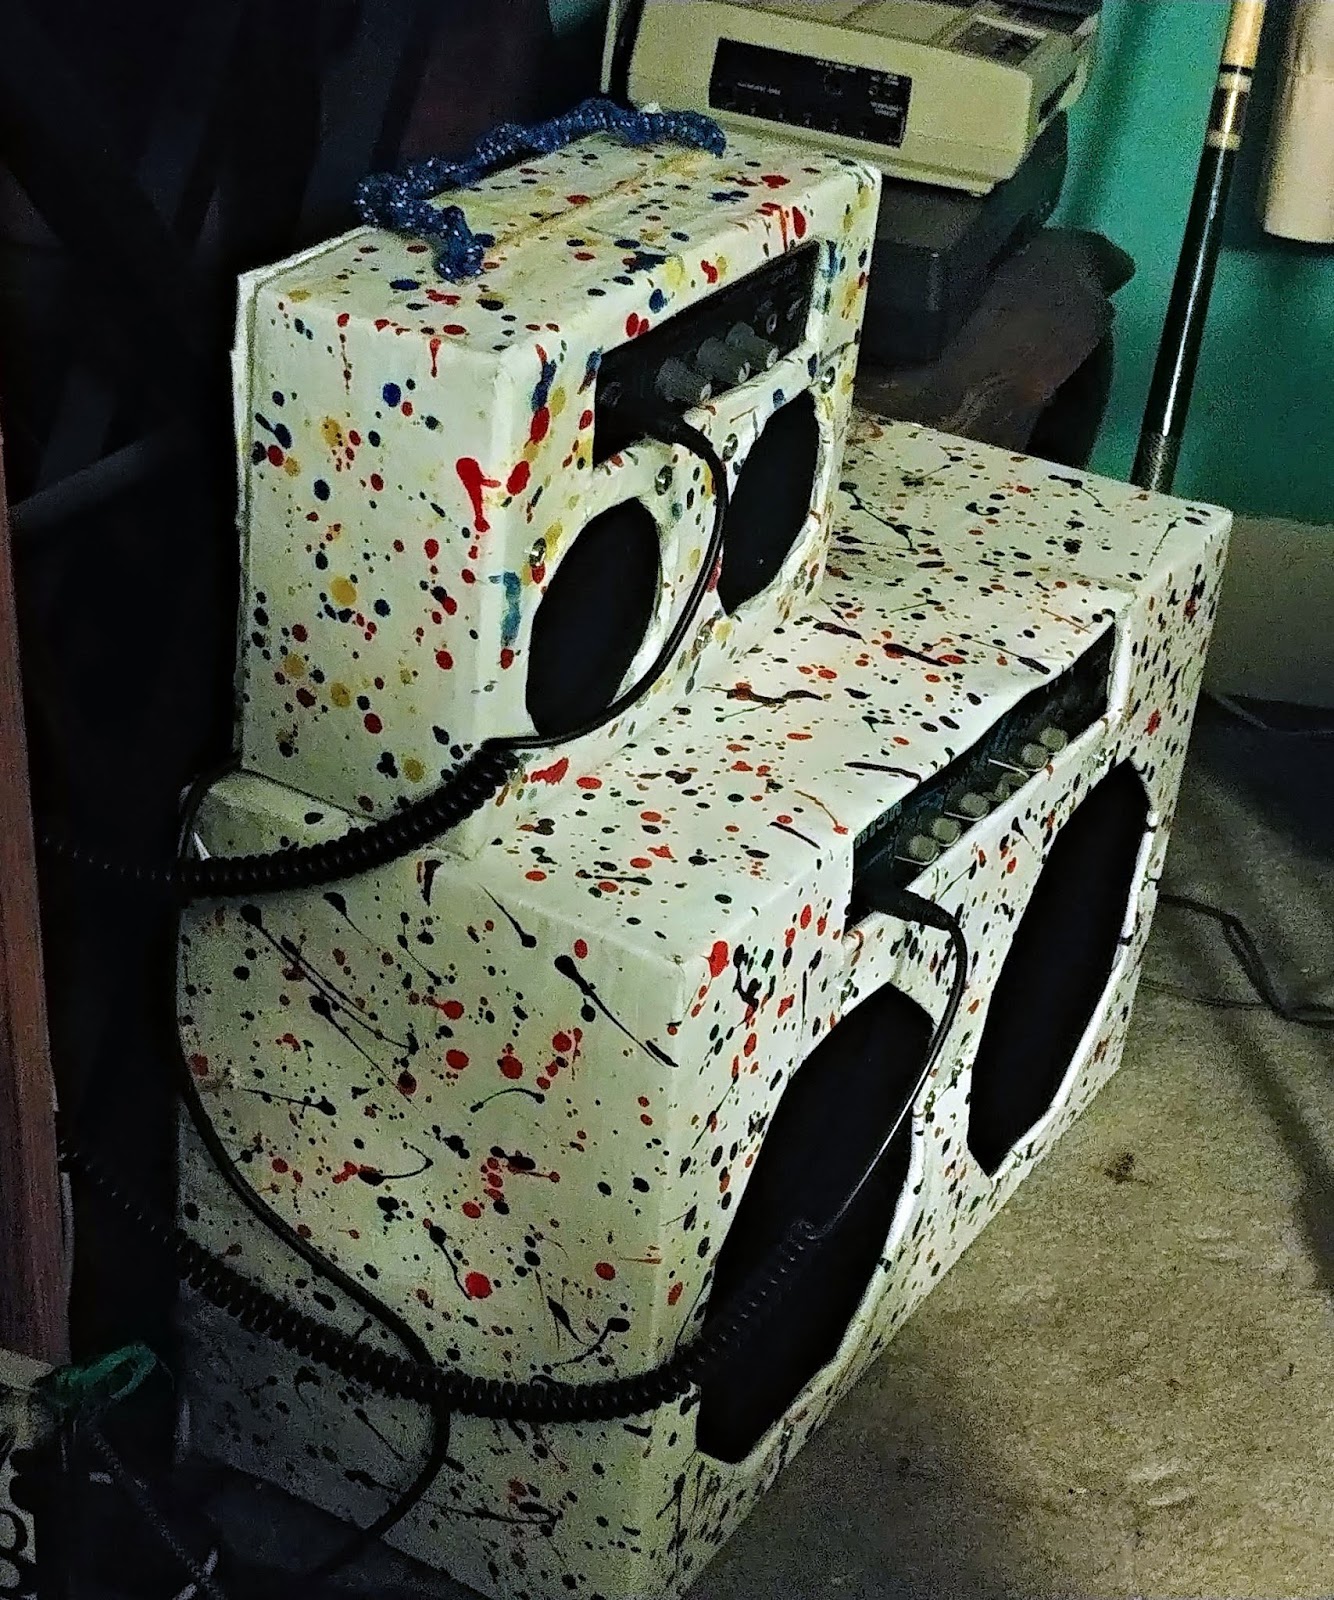
Paper Mache Guitar Amplifier Cabinets
Tuesday, December 4, 2018
Calyx Krater


Vases 1 & 2


Monday, May 16, 2016
Alien with Flying Saucer UFO
This is a character that has evolved through the creation process. It started out as one face from a wall of faces like in FFIX Oeilvert. I liked the face so much that I built a little grey alien body for him. I then tried to make a paper mache robot, but it would not stand and took up way too much space. That got crumpled and thrown away in favor of a simpler UFO vehicle. I saved the driver's seat and constructed the flying saucer much larger than originally planned. The lights around the edge are made from scraps of red-themed neckties wrapped around empty tape rolls. I did paper mache and painted it in my drybrushing combination of acrylic and tempera paint. The silver highlights are enamel model paint.


Sunday, May 3, 2015
Grim Reaper #2
I made a Grim Reaper for my cousin. This is becoming my signature piece. It's pretty quick and easy to make. I used a wire frame for the body, pipe cleaner hands and hot glued the animal skull on. An old pair of jeans provided fabric for the robe, which I stapled together. The final picture is of him in his new home.


Saturday, March 21, 2015
Sea Serpent
I designed the sea serpent to fit into my 3 billy goats gruff scene. His place is at the bottom of the waterfall where the water he is in provides closure to this scene. After all, the waterfall can't just drop off into nothing. I crafted the structure from cardboard, plastic food containers and tape. 2 coats of paper mache were applied and then I painted the whole deal. Working from dark to light in a mixture of tempera and acrylic, I painted it all black to start. I then used various degrees and techniques of dry brushing to apply color. The flat carboard of "water" curled up in some places, but I am otherwise satisfied with the result.


Thursday, February 19, 2015
Rapunzel in tower and Prince on motorcycle
Stinking with the fairytale theme, I decided to make a Rapunzel scene. The story is vague about what type of prince rescues Rapunzel, so I selected the artist formerly known as. I first crafted Prince and worked on his motorcycle at the same time, him having to reach the handlebars. I use cardboard to create the structure for my paper mache items. This involved learning about tempera paint, the cheapest I could find. I also discovered/invented aluminum foil mache for the wheels. The windshield is a plastic sleeve from a record with a bass string support on top. You can't see it in the pictures (let alone in person), but the seat of Prince's motorcycle has 2 types of faux animal fur and is fit for a porno flick. Bow chicka wownt wow. Pipecleaner TAFKA Prince and paper mache motorcycle complete, I moved on to Rapunzel in her tower. The tower came together quickly and easily. After some dry-brushing work on the paint, it was done. I then strove to create a beautiful Rapunzel with shining eyes made of marbles. It was a good idea, but I think she looks ugly and creepy. She may resemble Marilyn Manson a little. The yarn hair took some time and I found out after attaching all of it that her head would not support the immense weight of a full ball of yarn. Also, she requires the aid of a stylist to cover the holes in her head. Overall, I'm relatively pleased with the finished product and can't wait to start work on something new. You can probably look forward to some plastic bag mache, little red riding hood and an Edgar Allen Poe inspired piece.


Friday, November 7, 2014
3 Billy Goats Gruff Scene
This is the largest and most complex thing that I have ever made. I did the goats first with pipecleaners, then the troll and added denim from jeans as well as hemp twine, jute twine and cotton string and some beads. The upper background is purple paper wrapped around cardboard. I then used watercolors to apply a base coat and applied some crayon. Finding this too dull and muffled, I edged with marker and brightened things up with some oil pastel. The bridge is popsicle sticks glued together. I tied them with pipecleaners. The pipecleaner waterfall is on top of a heavily sculpted carboard base section. I did paper mache on it which I painted a dark greyish brown and dry-brushed highlights on.


Subscribe to:
Posts (Atom)